Period Configuration
An organization’s fiscal calendar is one of the first tasks that needs to be completed in the Solver product. Solver’s advanced period configuration wizard is fully customizable to meet almost any fiscal configuration. The wizard supports the following configurations:
- Standard 12 period calendars. Begin on Jan 1st and end on Dec 31st where each month represents a period
- 4-4-5, 4-5-4, 5-4-4 period configurations
- Many non-standard, “fiscal” configurations
- 13-53 Period configurations
The one configuration that Solver’s period wizard does not support is organization’s who have multiple fiscal calendars. For these configurations, please contact Solver Support (support@solverglobal.com).
This article will detail configuring Periods in Solver Cloud and Private Host. The instructions found here are relevant to Solver Cloud and Private Host version 5.2.30708 and newer.
Creating and Maintaining Periods
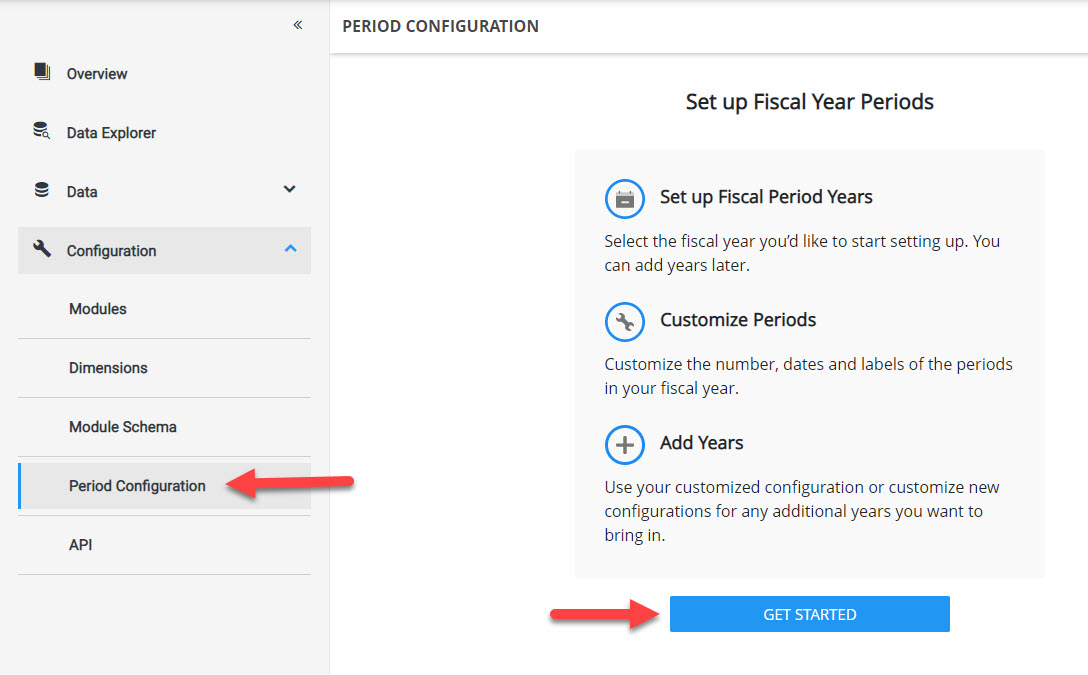
Upon logging into Solver and navigating to the Data Warehouse menu, if periods are not configured, on the Overview page, users are informed to configure their periods. Click the Period Configuration link to begin

- The Period Configuration wizard starts by providing a brief overview of the steps. Click Get Started to begin.
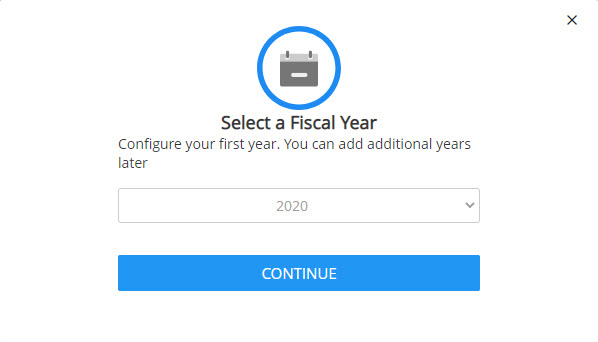
- A popup will appear asking users to select the first fiscal year to configure. This is typically going to be only a couple years prior to the current calendar year, in order to load historical data. If you are unsure, you can always add years later.
-
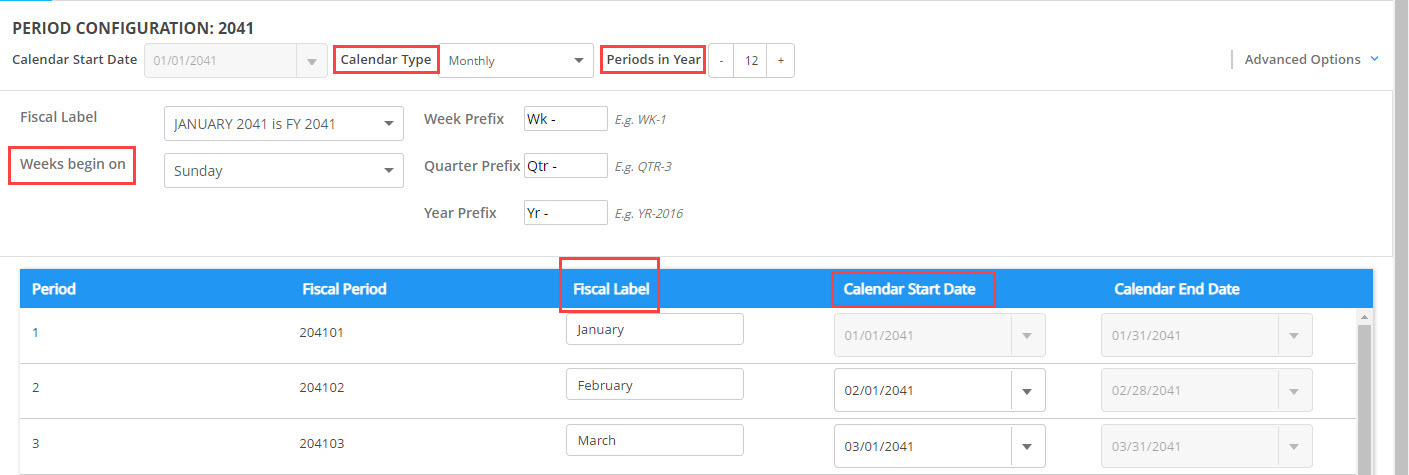
After clicking Continue, the fiscal year configuration will appear. It defaults to a standard calendar configuration where each period is representative of its respective month (ie the month of January represents Period 1). Users have the ability to change the following
- Number of periods per year.
- Period labels (January, February…)
- Calendar start dates
- Calendar type
- Weekday when the fiscal week begins
-
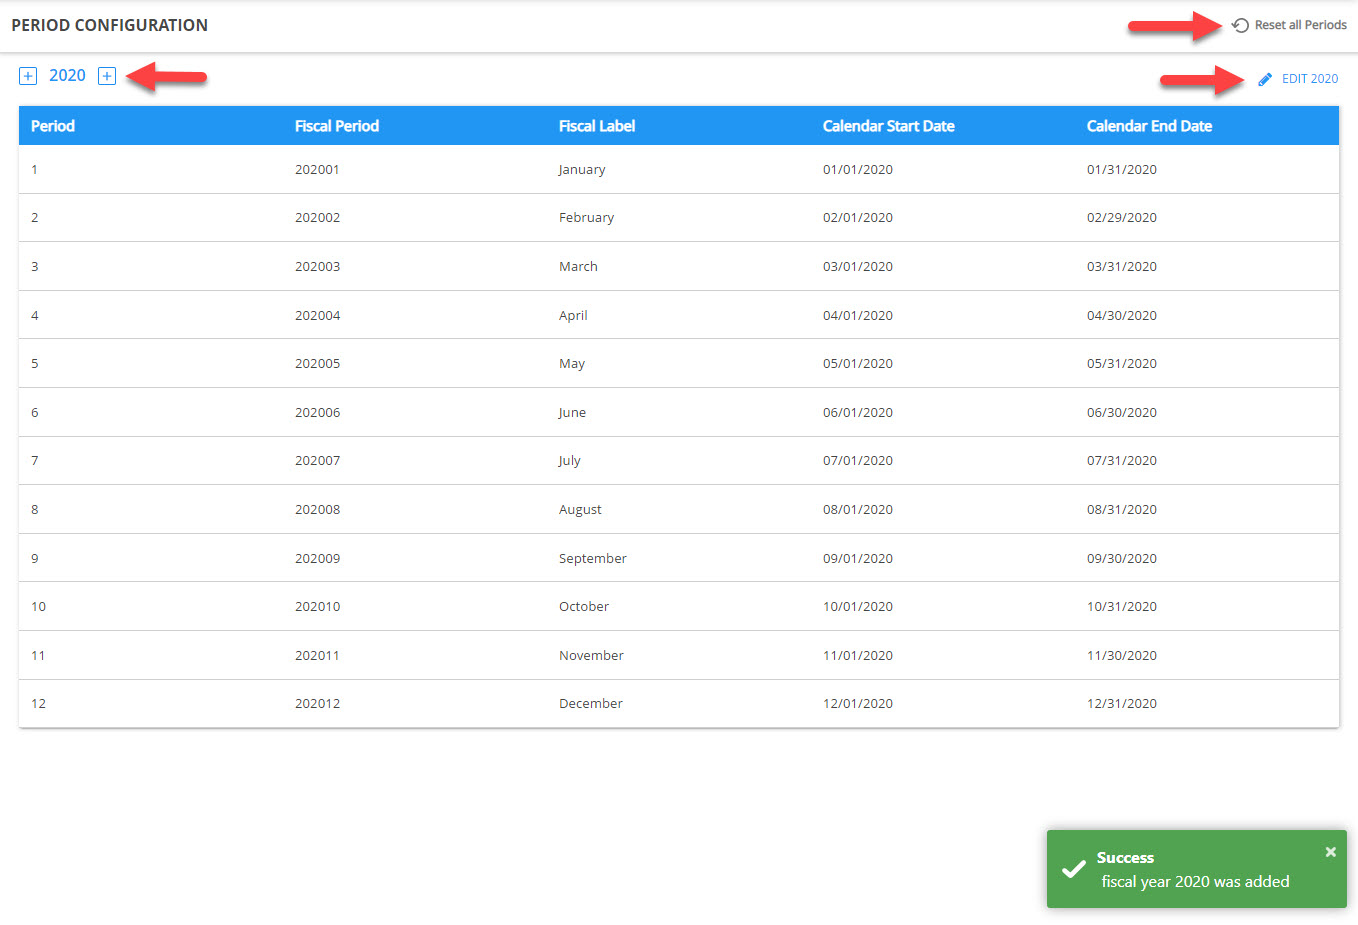
After configuring your periods as needed, click Create Periods in the bottom right hand corner. This will create your first fiscal year. There are some action buttons to be aware of here.
- Reset all Periods: This button only appears when there is no data in the database. Click this button if you need to reset the entire Period configuration
- + icons: Add prior years or years into the future. Users are able to add up to 10 years at one time. Upon clicking the + icon a drop down will appear allowing the user to select up to 10 years. Once an option is clicked, the screen will refresh with the number of years to be added.
- Edit YYYY: Click this icon to edit the selected fiscal year (in blue text). Within editing a select fiscal year, users will also have the option to delete that specific fiscal year. This action is found in the bottom right hand corner of the Edit YYYY screen. Note that this individual fiscal year deletion functionality is only available for the very first or most recent fiscal year.