Overview
Solver Jobs allow the user to schedule the loading and transformation of data as configured with your integrations and imported business rules.
Users are able to perform the following actions:
- Create scheduled jobs
- Run existing jobs
- Create job copies
- Edit existing jobs
- Delete jobs
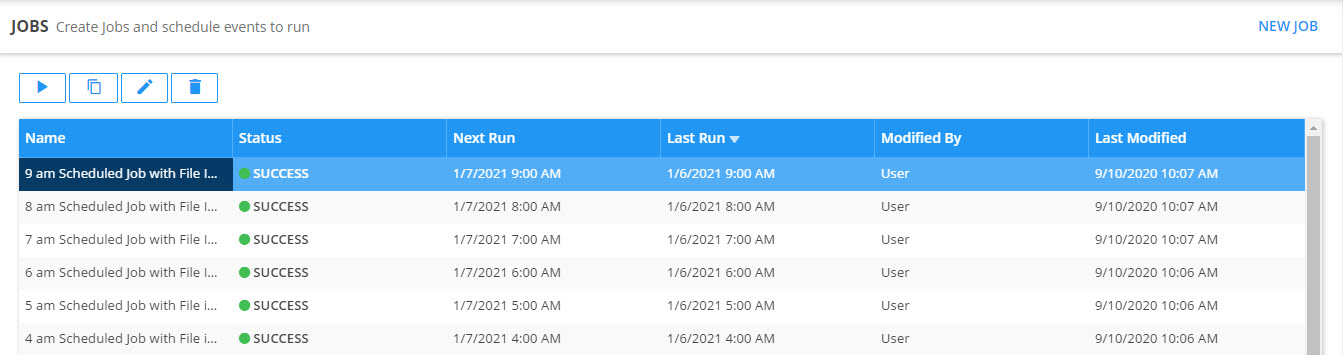
The jobs table shows all jobs previously created and ran by the user. The following job details are displayed in the Solver Portal:
- Name: The job name set by the user during job creation
- Status: Gives real time update on the status of each job, and whether they succeeded or failed
- Next Run: Indicates the next day and time when the job is scheduled to automatically run. If a user did not set a schedule during job creation, this cell will be blank
- Last Run: Displays the day and time when the job was last ran
- Modified By: Indicates which user most recently modified the given job
- Last Modified: Shows the day and time when the given job was modified by the user in the Modified By column
Creating New Jobs
To create a new job:
- Navigate to Data > Jobs page.
- If Data Warehouse permission to edit jobs are enabled for your user, a New Job button appears at the top right corner of the page.
- Click this to navigate to the job creation page. This is where you can customize and schedule the loading and transformation of data into the Data Warehouse.
Running Existing Jobs
There are two ways to run existing jobs, either manually select them to run or set them to automatically run on a schedule.
To run a job manually:
- Navigate to Data > Jobs page.
- If Data Warehouse permission to run jobs are enabled for your user, the Run button appears as the first button of the top left menu.
- Select the desired job and click Run.
- The status of the selected job will then update from Queued > Processing. This indicates the job is currently running.
- The status will then change to either Success or Fail, indicating the job finished running.
To automatically run a job:
- Navigate to Data > Jobs page.
- Any existing job with a previously set schedule will show the next day and time it will automatically run in the Next Run column.
- If the desired job doesn’t have a set schedule to automatically run, then select the job and click Edit. This will navigate the user to the Edit Job page.
- From here, find the Schedule Job section and set a new schedule.
- After clicking Update, the user navigates back to the jobs overview page. The desired job will now automatically run at the frequency, day and time set by the user.
Deleting Existing Jobs
To delete an existing job:
- Navigate to Data > Jobs page.
- If Data Warehouse permission to edit jobs are enabled for your user, the Delete button appears as the last button of the top left menu.
- Select the desired job and click Delete.
- The Delete Job modal appears, asking for user confirmation.
- Clicking Delete will close the modal and remove job from the jobs table. Clicking Cancel will close the modal, leaving the job as is in the jobs table.